Before you follow the instructions on this page, ensure you have launched the video landing page through Beaver Builder.
Editing the preamble:
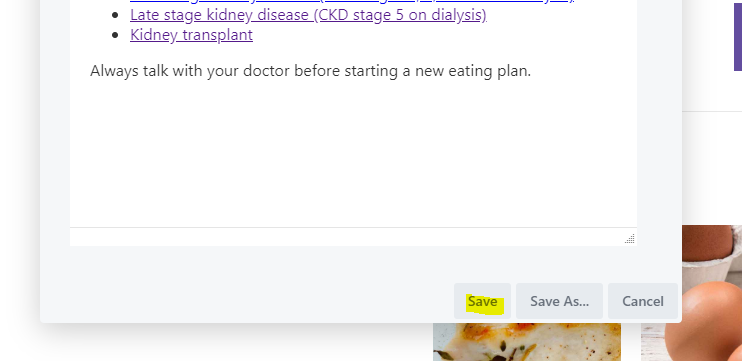
1. Select the text and make the necessary edits in the popup box.
2. Once completed, click ‘Save’ at the bottom of the box.
3. Click ‘Done’ located at the top right corner of the page.
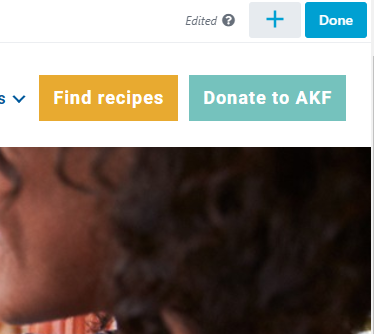
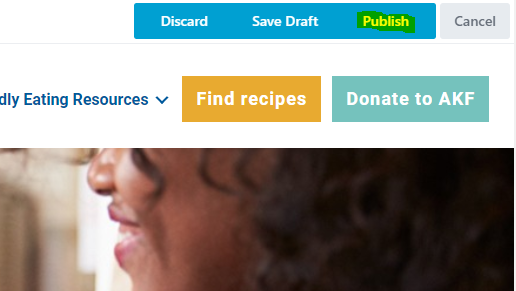
4. Click ‘Publish’.
Editing the video carousel:
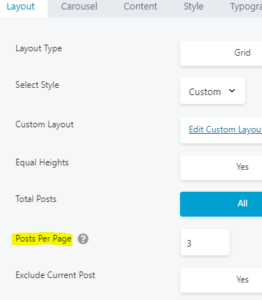
1. Click on the carousel and a popup box should appear.
2. To change the number of videos appearing in the carousel, change the number to your desired number under the field ‘Posts Per Page’.
3. To change the timing and format of the carousel, click on the ‘Carousel’ tab and edit the necessary fields.
4. Once completed, ensure you save all changes and publish them according to steps 2 to 4 above.
Editing the video gallery:
1. Click anywhere on the video gallery and a popup box should appear.
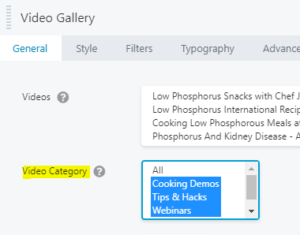
2. To change the video categories on display, highlight the categories you wish to display, under ‘Video Category’. To select multiple non-consecutive categories, hold ‘Ctrl’ key and click the categories you wish to show.
3. To change the icon on the video thumbnails, under the ‘General’ tab, look for ‘Overlay’.
4. Click on ‘Replace’ under the icon section and select your new icon.
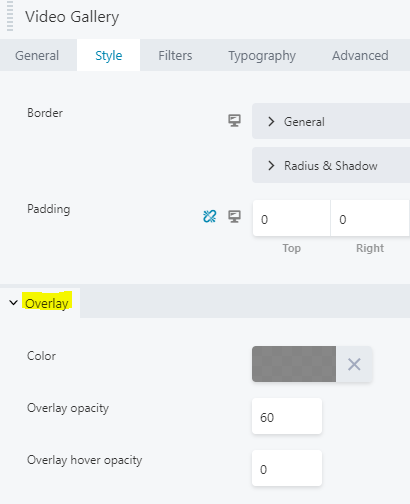
5. To change the background opacity of the video thumbnails, under the ‘Style’ tab, look for ‘Overlay’.
6. Adjust the opacity number and color to your desired amount and color.
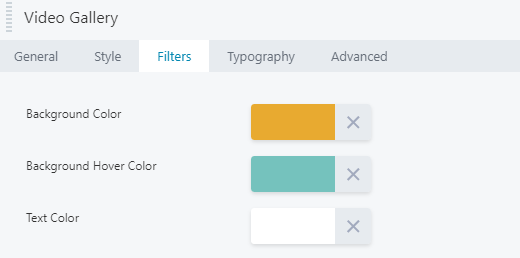
7. To adjust the filter buttons above the video gallery, select the ‘Filters’ tab.
8. To change the background and text color, simply adjust the fields shown in the picture.
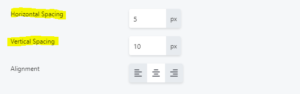
9. To change the spacing between the buttons, adjust the px values accordingly (the larger the number, the bigger the spacing).
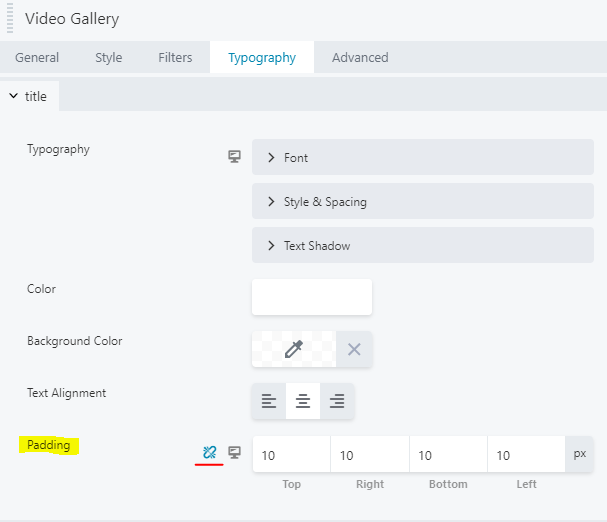
10. To change the layout of the text on the video thumbnails, select the ‘Typography’ tab.
11. Change the font styles and color at their respective fields. Adjusting the ‘Padding’ field will change the location of the icon and title on the video thumbnail. Ensure the link icon is highlighted in blue so that any changes made to the padding will be the same in all directions.
A preview of any changes you make will be shown in the background. If you make an error, simply click ‘Cancel’ at the bottom of the popup box and the layout will return to its original settings.
12. Once you are satisfied with the changes, ensure you click ‘Save’ at the bottom of the popup box.
13. Click ‘Done’ located at the top right corner of the page.
14. Click ‘Publish’.